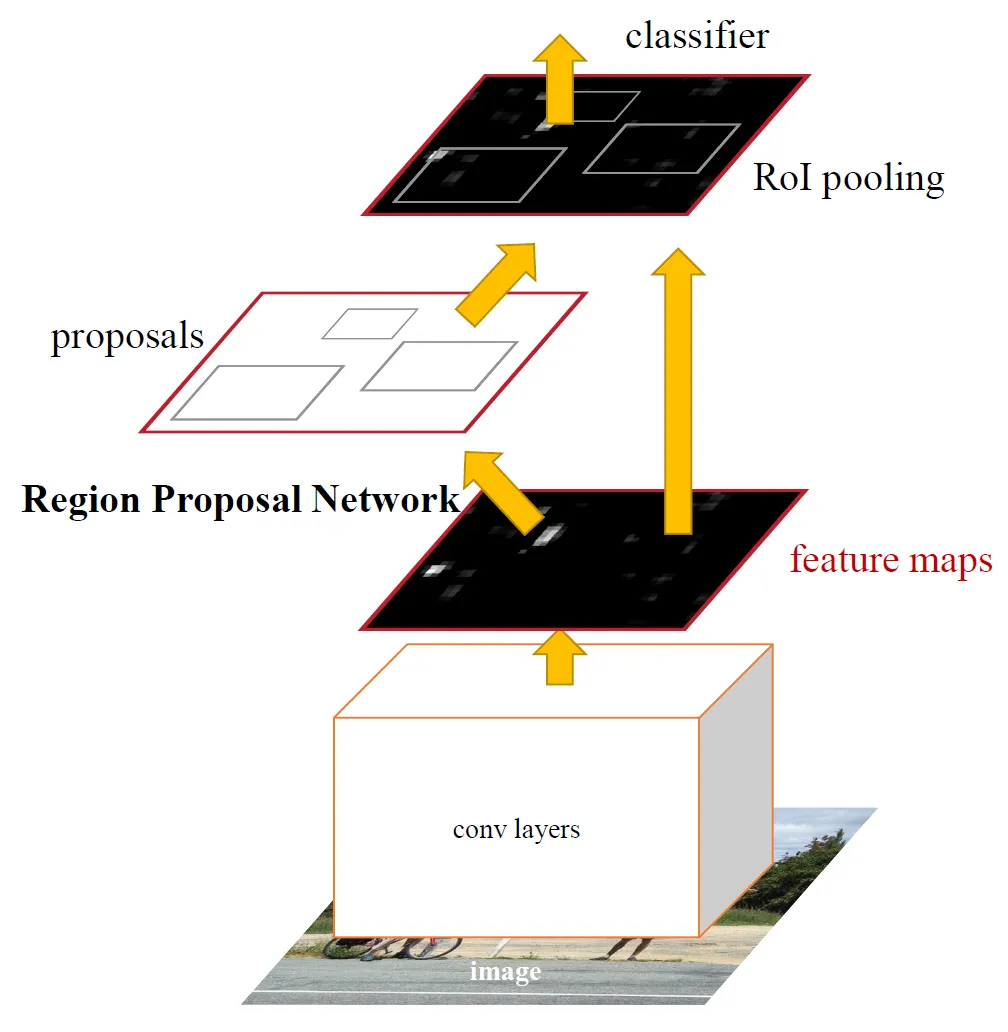
Faster R-CNN
Faster R-CNN + MobileNetV3 백본 커스텀 학습 Faster R-CNN 모델에 MobileNetV3 백본을 적용하여 경량화된 커스텀 객체 탐지 모델을 구현하는 과정을 정리했습니다. YOLO 형식의 데이터셋을 Faster R-CNN 학습용으로 변환하는 데이터 전처리 코드, PyTorch 기반의 학습 및 검증 파이프라인 구성, 성능 평가 지표(mAP, Precision, Recall) 계산, 최종 객체 감지 결과 시각화까지 전체 워크플로우를 자세히 소개합니다. RCNN 학습을 위한 코드 예제와 함께 실습 중심의 가이드
yolo, rt-detr에 이어 fater rcnn에 대해서 짧게 글을 남겨보려 한다.
이번에는 MobileNet V3를 백본으로 사용하였다.
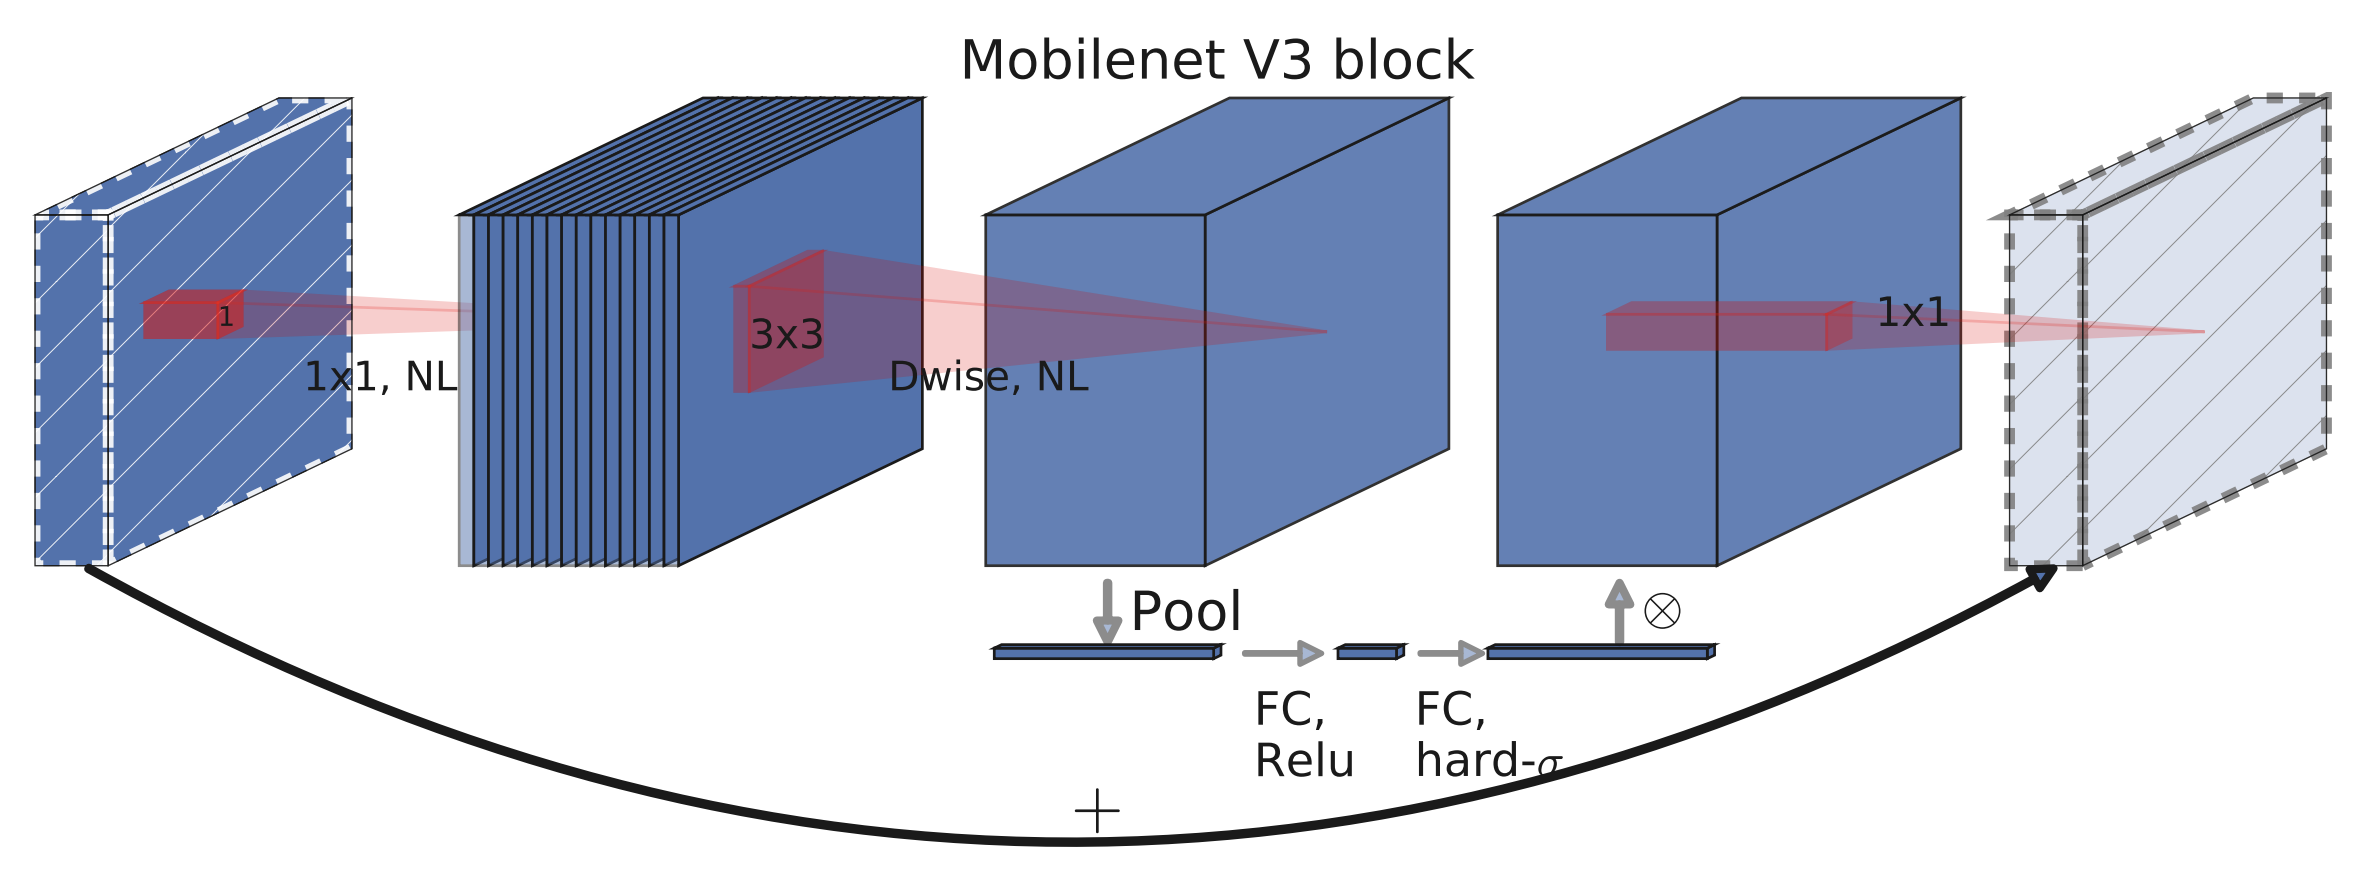
Faster R-CNN은 객체 탐지 분야에서 높은 정확도를 제공하는 모델이다. 그러나 연산량이 많아 실시간 처리에 제약이 따른다. 이를 개선하기 위해 경량화된 백본 네트워크인 MobileNetV3를 결합한 Faster R-CNN 모델이 개발되었다. MobileNetV3는 효율적인 구조와 성능으로 알려져 있으며, 이를 백본으로 사용함으로써 모델의 경량화와 추론 속도를 향상시킬 수 있다. 특히, PyTorch의 torchvision 라이브러리는 MobileNetV3-Large를 백본으로 하는 Faster R-CNN 모델을 제공하며, Feature Pyramid Network(FPN)를 활용하여 다양한 크기의 객체에 대한 탐지 성능을 향상시킨다. 이러한 결합을 통해 실시간 객체 탐지가 필요한 애플리케이션에서 효과적인 솔루션을 제공할 수 있다.
생각보다 rcnn을 커스텀 트레이닝 하는 것이 조금 어려웠다.
필자의 경우 yolo형식의 데이터셋만 가지고 있었는데, 이를 rcnn양식으로 바꾸기 위해서 데이터셋 변환 코드를 직접 구현해서 rcnn에 적합한 데이터셋 형식으로 맞춰주었다. 그 다음 MobileNetV3 백본을 이용하여 커스텀 트레이닝을 진행하였다.
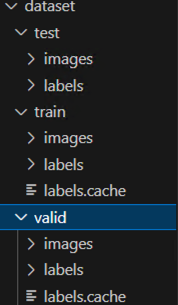
기존 yolo폴더 구조를 rcnn양식으로 바꿔주어야한다.
dataset/
│
├── train/           # 학습 데이터 이미지 폴더
│   ├── image1.jpg
│   ├── image2.jpg
│   └── ...
│
├── val/             # 검증 데이터 이미지 폴더
│   ├── image1.jpg
│   ├── image2.jpg
│   └── ...
│
└── labels/          # 라벨 폴더
    ├── train/       # 학습 데이터의 라벨 (텍스트 파일들)
    │   ├── image1.txt
    │   ├── image2.txt
    │   └── ...
    │
    └── val/         # 검증 데이터의 라벨 (텍스트 파일들)
        ├── image1.txt
        ├── image2.txt
        └── ...
yolo폴더
dataset/
├── test/
│ ├── images/
│ └── labels/
├── train/
│ ├── images/
│ └── labels/
└── valid/
├── images/
└── labels/
이를 구현하기 위한 코드가 아래 코드이다.
import os
import torch
import cv2
import numpy as np
from torch.utils.data import Dataset, DataLoader
import torchvision.transforms as transforms
from torchvision.transforms import functional as F
# 클래스 정의
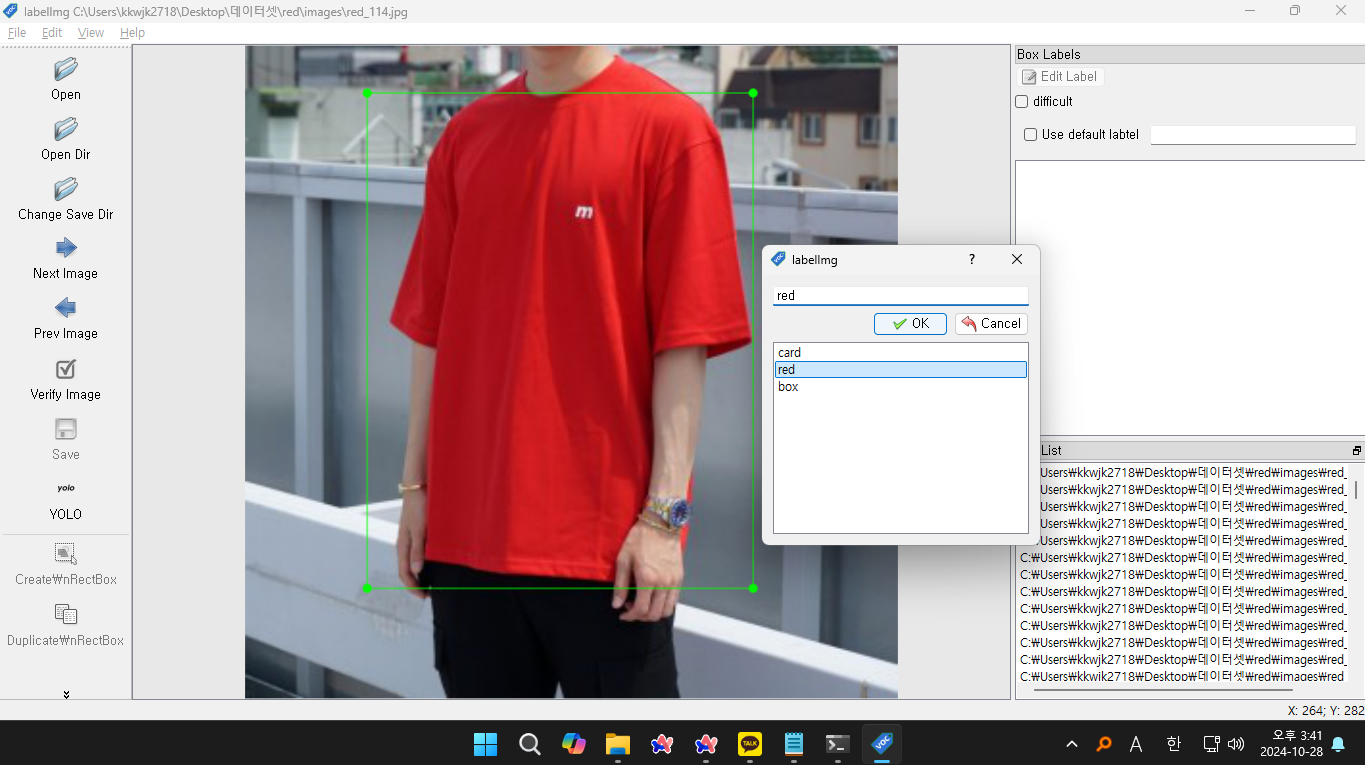
CLASSES = {0: "card", 1: "red", 2: "box"}
# YOLO 형식 -> RCNN 형식 변환하는 Dataset 클래스
class YoloToRCNNDataset(Dataset):
def __init__(self, root_dir, transform=None):
self.root_dir = root_dir
self.image_dir = os.path.join(root_dir, "images")
self.label_dir = os.path.join(root_dir, "labels")
self.transform = transform
self.image_files = sorted([f for f in os.listdir(self.image_dir) if f.endswith(".jpg")])
self.label_files = sorted([f.replace(".jpg", ".txt") for f in self.image_files])
def __len__(self):
return len(self.image_files)
def __getitem__(self, idx):
img_path = os.path.join(self.image_dir, self.image_files[idx])
label_path = os.path.join(self.label_dir, self.label_files[idx])
# 이미지 로드
img = cv2.imread(img_path)
img = cv2.cvtColor(img, cv2.COLOR_BGR2RGB)
height, width, _ = img.shape
# 바운딩 박스 및 레이블 로드
boxes = []
labels = []
if os.path.exists(label_path):
with open(label_path, "r") as f:
for line in f.readlines():
parts = line.strip().split()
class_id = int(parts[0])
x_center, y_center, w, h = map(float, parts[1:])
# YOLO -> RCNN 좌표 변환
x_min = (x_center - w / 2) * width
y_min = (y_center - h / 2) * height
x_max = (x_center + w / 2) * width
y_max = (y_center + h / 2) * height
boxes.append([x_min, y_min, x_max, y_max])
labels.append(class_id + 1) # RCNN에서는 0이 background라서 +1
# 텐서 변환
boxes = torch.as_tensor(boxes, dtype=torch.float32)
labels = torch.as_tensor(labels, dtype=torch.int64)
image_id = torch.tensor([idx])
area = (boxes[:, 2] - boxes[:, 0]) * (boxes[:, 3] - boxes[:, 1])
iscrowd = torch.zeros((len(boxes),), dtype=torch.int64)
target = {
"boxes": boxes,
"labels": labels,
"image_id": image_id,
"area": area,
"iscrowd": iscrowd
}
if self.transform:
img = F.to_tensor(img)
return img, target
# 데이터셋 경로
DATASET_DIR = "./dataset"
# train, valid, test 데이터셋 변환
datasets = {
"train": YoloToRCNNDataset(os.path.join(DATASET_DIR, "train")),
"valid": YoloToRCNNDataset(os.path.join(DATASET_DIR, "valid")),
"test": YoloToRCNNDataset(os.path.join(DATASET_DIR, "test"))
}
# 데이터로더 생성
data_loaders = {
phase: DataLoader(datasets[phase], batch_size=4, shuffle=True, collate_fn=lambda batch: tuple(zip(*batch)))
for phase in ["train", "valid", "test"]
}
print("Dataset transformation complete! ✅")
클래스에는 각자 사용한 클래스명을 작성해주면 된다.
그러면 아래처럼 데이터셋들이 변환되었을 것이다.
이제 학습을 진행시켜 보자.
import os
import torch
import torchvision
import torch.optim as optim
from torch.utils.data import Dataset, DataLoader
from torchvision.transforms import functional as F
import cv2
import numpy as np

# 클래스 정의 (YOLO에 사용된 클래스 매핑)
CLASSES = {0: "card", 1: "red", 2: "box"}
NUM_CLASSES = len(CLASSES) + 1  # Background 포함

# YOLO 형식 → RCNN 형식 변환하는 Dataset 클래스
class YoloToRCNNDataset(Dataset):
    def __init__(self, root_dir):
        self.root_dir = root_dir
        self.image_dir = os.path.join(root_dir, "images")
        self.label_dir = os.path.join(root_dir, "labels")
        self.image_files = sorted([f for f in os.listdir(self.image_dir) if f.endswith(".jpg")])
        self.label_files = sorted([f.replace(".jpg", ".txt") for f in self.image_files])

    def __len__(self):
        return len(self.image_files)

    def __getitem__(self, idx):
        img_path = os.path.join(self.image_dir, self.image_files[idx])
        label_path = os.path.join(self.label_dir, self.label_files[idx])

        # 이미지 로드
        img = cv2.imread(img_path)
        img = cv2.cvtColor(img, cv2.COLOR_BGR2RGB)
        height, width, _ = img.shape

        # 바운딩 박스 및 레이블 로드
        boxes = []
        labels = []

        if os.path.exists(label_path):
            with open(label_path, "r") as f:
                for line in f.readlines():
                    parts = line.strip().split()
                    class_id = int(parts[0])
                    x_center, y_center, w, h = map(float, parts[1:])

                    # YOLO → RCNN 좌표 변환
                    x_min = (x_center - w / 2) * width
                    y_min = (y_center - h / 2) * height
                    x_max = (x_center + w / 2) * width
                    y_max = (y_center + h / 2) * height

                    boxes.append([x_min, y_min, x_max, y_max])
                    labels.append(class_id + 1)  # RCNN은 background=0이라서 +1

        # 바운딩 박스가 없는 경우 예외 처리 (빈 텐서 추가)
        if len(boxes) == 0:
            boxes = torch.zeros((0, 4), dtype=torch.float32)
            labels = torch.zeros((0,), dtype=torch.int64)
            area = torch.tensor([0.0])
        else:
            boxes = torch.as_tensor(boxes, dtype=torch.float32)
            labels = torch.as_tensor(labels, dtype=torch.int64)
            area = (boxes[:, 2] - boxes[:, 0]) * (boxes[:, 3] - boxes[:, 1])

        iscrowd = torch.zeros((len(boxes),), dtype=torch.int64)
        image_id = torch.tensor([idx])

        target = {
            "boxes": boxes,
            "labels": labels,
            "image_id": image_id,
            "area": area,
            "iscrowd": iscrowd
        }

        img = F.to_tensor(img)
        return img, target


# ✅ Windows에서 multiprocessing 오류 해결
if __name__ == "__main__":
    import torch.multiprocessing as mp
    mp.freeze_support()

    # 데이터셋 경로
    DATASET_DIR = "./dataset"

    # train, valid 데이터셋 변환
    datasets = {
        "train": YoloToRCNNDataset(os.path.join(DATASET_DIR, "train")),
        "valid": YoloToRCNNDataset(os.path.join(DATASET_DIR, "valid"))
    }

    # ✅ collate_fn을 별도 함수로 정의 (Windows에서 lambda 충돌 방지)
    def custom_collate_fn(batch):
        return tuple(zip(*batch))

    # 데이터로더 생성 (num_workers=0으로 설정)
    data_loaders = {
        phase: DataLoader(
            datasets[phase], batch_size=8, shuffle=True, num_workers=0, collate_fn=custom_collate_fn
        )
        for phase in ["train", "valid"]
    }

    # ✅ MobileNetV3 백본 사용 (더 빠름)
    model = torchvision.models.detection.fasterrcnn_mobilenet_v3_large_fpn(weights="DEFAULT")

    # 모델의 출력 클래스 수 변경
    in_features = model.roi_heads.box_predictor.cls_score.in_features
    model.roi_heads.box_predictor = torchvision.models.detection.faster_rcnn.FastRCNNPredictor(in_features, NUM_CLASSES)

    # CUDA 설정
    device = torch.device("cuda" if torch.cuda.is_available() else "cpu")
    model.to(device)

    # 옵티마이저 설정
    optimizer = optim.Adam(model.parameters(), lr=0.0001)
    scaler = torch.amp.GradScaler(device="cuda")

    # 학습 함수
    def train_one_epoch(model, optimizer, data_loader, device):
        model.train()
        total_loss = 0.0

        for images, targets in data_loader:
            images = list(img.to(device) for img in images)
            targets = [{k: v.to(device) for k, v in t.items()} for t in targets]

            optimizer.zero_grad()
            with torch.amp.autocast(device_type="cuda"):
                loss_dict = model(images, targets)
                losses = sum(loss for loss in loss_dict.values())

            scaler.scale(losses).backward()
            scaler.step(optimizer)
            scaler.update()

            total_loss += losses.item()

        avg_loss = total_loss / len(data_loader)
        print(f"Loss: {avg_loss:.4f}")

    # 학습 실행
    num_epochs = 10
    for epoch in range(num_epochs):
        print(f"Epoch {epoch+1}/{num_epochs} Training...")
        train_one_epoch(model, optimizer, data_loaders["train"], device)

    # ✅ 모델 저장
    MODEL_SAVE_PATH = "faster_rcnn_trained.pth"
    torch.save(model.state_dict(), MODEL_SAVE_PATH)
    print(f"✅ 모델이 저장되었습니다: {MODEL_SAVE_PATH}")

    # ✅ 모델 검증 (Validation) 수행
    model.eval()
    total_correct = 0
    total_images = 0

    with torch.no_grad():
        for images, targets in data_loaders["valid"]:
            images = list(img.to(device) for img in images)
            predictions = model(images)

            for pred, target in zip(predictions, targets):
                pred_labels = pred["labels"].cpu().numpy()
                target_labels = target["labels"].cpu().numpy()

                correct = np.sum(np.isin(pred_labels, target_labels))
                total_correct += correct
                total_images += 1

    accuracy = total_correct / total_images
    print(f"✅ 검증 데이터 정확도: {accuracy:.2%}")
여기까지 진행되었다면 프로젝트 폴더 내에 모델 가중치 파일이 저장되었을 것이다.
저장된 모델을 가지고 간단한 성능 평가도 진행해보자
import os
import torch
import torchvision
from torch.utils.data import DataLoader
import numpy as np
import cv2
from torchvision.transforms import functional as F

# ✅ 클래스 정의 (학습할 때 사용한 클래스와 동일해야 함)
CLASSES = {0: "card", 1: "red", 2: "box"}
NUM_CLASSES = len(CLASSES) + 1  # Background 포함

# ✅ IOU(Intersection over Union) 계산 함수
def compute_iou(box1, box2):
    """ 두 바운딩 박스 간 IOU(교집합/합집합)를 계산 """
    x1, y1, x2, y2 = box1
    x1g, y1g, x2g, y2g = box2

    # 교집합 영역 계산
    xi1 = max(x1, x1g)
    yi1 = max(y1, y1g)
    xi2 = min(x2, x2g)
    yi2 = min(y2, y2g)
    inter_area = max(0, xi2 - xi1) * max(0, yi2 - yi1)

    # 각 박스의 영역 계산
    box1_area = (x2 - x1) * (y2 - y1)
    box2_area = (x2g - x1g) * (y2g - y1g)
    union_area = box1_area + box2_area - inter_area

    return inter_area / union_area if union_area > 0 else 0.0

# ✅ Precision, Recall, F1-score, mAP 계산 함수
def evaluate_model(model, data_loader, device, iou_threshold=0.5):
    model.eval()
    total_tp = 0  # True Positives
    total_fp = 0  # False Positives
    total_fn = 0  # False Negatives
    all_precisions = []
    all_recalls = []
    all_ious = []

    with torch.no_grad():
        for images, targets in data_loader:
            images = [img.to(device) for img in images]
            targets = [{k: v.to(device) for k, v in t.items()} for t in targets]

            predictions = model(images)

            for pred, target in zip(predictions, targets):
                pred_boxes = pred["boxes"].cpu().numpy()
                pred_scores = pred["scores"].cpu().numpy()
                pred_labels = pred["labels"].cpu().numpy()

                gt_boxes = target["boxes"].cpu().numpy()
                gt_labels = target["labels"].cpu().numpy()

                matched_gt = set()  # 매칭된 GT 인덱스

                for i, (pbox, plabel, pscore) in enumerate(zip(pred_boxes, pred_labels, pred_scores)):
                    if pscore < 0.5:  # 신뢰도 낮은 박스 무시
                        continue

                    best_iou = 0
                    best_gt_idx = -1

                    for j, (gt_box, gt_label) in enumerate(zip(gt_boxes, gt_labels)):
                        if gt_label == plabel:  # 같은 클래스만 비교
                            iou = compute_iou(pbox, gt_box)
                            if iou > best_iou:
                                best_iou = iou
                                best_gt_idx = j

                    if best_iou >= iou_threshold and best_gt_idx not in matched_gt:
                        total_tp += 1  # True Positive
                        matched_gt.add(best_gt_idx)
                        all_ious.append(best_iou)
                    else:
                        total_fp += 1  # False Positive

                # False Negative 계산
                total_fn += len(gt_boxes) - len(matched_gt)

    # Precision, Recall, F1-score 계산
    precision = total_tp / (total_tp + total_fp) if (total_tp + total_fp) > 0 else 0
    recall = total_tp / (total_tp + total_fn) if (total_tp + total_fn) > 0 else 0
    f1_score = 2 * (precision * recall) / (precision + recall) if (precision + recall) > 0 else 0
    mAP = np.mean(all_ious) if all_ious else 0  # 평균 IoU를 mAP로 사용

    return precision, recall, f1_score, mAP

# ✅ 모델 로드 함수
def load_model(model_path):
    model = torchvision.models.detection.fasterrcnn_mobilenet_v3_large_fpn(weights="DEFAULT")
    in_features = model.roi_heads.box_predictor.cls_score.in_features
    model.roi_heads.box_predictor = torchvision.models.detection.faster_rcnn.FastRCNNPredictor(in_features, NUM_CLASSES)
    model.load_state_dict(torch.load(model_path))
    model.eval()
    return model

# ✅ 데이터셋 로드
class YoloToRCNNDataset(torch.utils.data.Dataset):
    def __init__(self, root_dir):
        self.root_dir = root_dir
        self.image_dir = os.path.join(root_dir, "images")
        self.label_dir = os.path.join(root_dir, "labels")
        self.image_files = sorted([f for f in os.listdir(self.image_dir) if f.endswith(".jpg")])
        self.label_files = sorted([f.replace(".jpg", ".txt") for f in self.image_files])

    def __len__(self):
        return len(self.image_files)

    def __getitem__(self, idx):
        img_path = os.path.join(self.image_dir, self.image_files[idx])
        label_path = os.path.join(self.label_dir, self.label_files[idx])

        img = cv2.imread(img_path)
        img = cv2.cvtColor(img, cv2.COLOR_BGR2RGB)
        height, width, _ = img.shape

        boxes = []
        labels = []

        if os.path.exists(label_path):
            with open(label_path, "r") as f:
                for line in f.readlines():
                    parts = line.strip().split()
                    class_id = int(parts[0])
                    x_center, y_center, w, h = map(float, parts[1:])

                    x_min = (x_center - w / 2) * width
                    y_min = (y_center - h / 2) * height
                    x_max = (x_center + w / 2) * width
                    y_max = (y_center + h / 2) * height

                    boxes.append([x_min, y_min, x_max, y_max])
                    labels.append(class_id + 1)

        boxes = torch.as_tensor(boxes, dtype=torch.float32)
        labels = torch.as_tensor(labels, dtype=torch.int64)
        image_id = torch.tensor([idx])

        target = {"boxes": boxes, "labels": labels, "image_id": image_id}
        img = F.to_tensor(img)

        return img, target

# ✅ 실행 코드
if __name__ == "__main__":
    DEVICE = torch.device("cuda" if torch.cuda.is_available() else "cpu")

    # 데이터 로드
    valid_dataset = YoloToRCNNDataset("./dataset/valid")
    valid_loader = DataLoader(valid_dataset, batch_size=8, shuffle=False, num_workers=0, collate_fn=lambda batch: tuple(zip(*batch)))

    # 모델 로드
    model = load_model("faster_rcnn_trained.pth").to(DEVICE)

    # 모델 평가
    precision, recall, f1_score, mAP = evaluate_model(model, valid_loader, DEVICE)

    # 결과 출력
    print(f"✅ Precision: {precision:.4f}")
    print(f"✅ Recall: {recall:.4f}")
    print(f"✅ F1 Score: {f1_score:.4f}")
    print(f"✅ mAP: {mAP:.4f}")
위 코드를 사용하면 간단히 모델에 대한 성능평가도 진행 될 것이다!
마지막으로 학습된 모델을 사용하여 객체 인식도 진행해보자
import torch
import torchvision
import cv2
import numpy as np
import matplotlib.pyplot as plt
from torchvision.transforms import functional as F

# ✅ 클래스 정의 (학습한 데이터셋과 동일해야 함)
CLASSES = {0: "card", 1: "red", 2: "box"}
NUM_CLASSES = len(CLASSES) + 1  # Background 포함

# ✅ 모델 로드
MODEL_PATH = "faster_rcnn_trained.pth"

# 모델 초기화 (학습할 때 사용한 백본과 동일해야 함)
model = torchvision.models.detection.fasterrcnn_mobilenet_v3_large_fpn(weights="DEFAULT")

# 출력 클래스 개수 수정
in_features = model.roi_heads.box_predictor.cls_score.in_features
model.roi_heads.box_predictor = torchvision.models.detection.faster_rcnn.FastRCNNPredictor(in_features, NUM_CLASSES)

# ✅ 저장된 가중치 로드
model.load_state_dict(torch.load(MODEL_PATH))
model.eval()

# ✅ CUDA 사용 설정
device = torch.device("cuda" if torch.cuda.is_available() else "cpu")
model.to(device)

# ✅ 객체 감지 함수
def detect_objects(image_path, threshold=0.5):
    # 이미지 로드
    img = cv2.imread(image_path)
    img = cv2.cvtColor(img, cv2.COLOR_BGR2RGB)

    # 원본 이미지 저장 (출력용)
    original_img = img.copy()

    # 이미지 전처리
    img_tensor = F.to_tensor(img).unsqueeze(0).to(device)

    # 모델 예측
    with torch.no_grad():
        predictions = model(img_tensor)

    # 바운딩 박스 정보 가져오기
    for i in range(len(predictions[0]["boxes"])):
        score = predictions[0]["scores"][i].item()
        if score > threshold:
            box = predictions[0]["boxes"][i].cpu().numpy().astype(int)
            label = predictions[0]["labels"][i].item() - 1  # background 제외
            class_name = CLASSES.get(label, "Unknown")

            # 바운딩 박스 그리기
            cv2.rectangle(original_img, (box[0], box[1]), (box[2], box[3]), (0, 255, 0), 2)
            cv2.putText(original_img, f"{class_name} {score:.2f}",
                        (box[0], box[1] - 10), cv2.FONT_HERSHEY_SIMPLEX,
                        0.5, (0, 255, 0), 2)

    # 결과 이미지 저장
    result_path = "red_result.jpg"
    cv2.imwrite(result_path, cv2.cvtColor(original_img, cv2.COLOR_RGB2BGR))

    # 이미지 출력
    plt.figure(figsize=(8, 6))
    plt.imshow(original_img)
    plt.axis("off")
    plt.title("Object Detection Result")
    plt.show()

    print(f"✅ 객체 감지 결과가 저장되었습니다: {result_path}")

# ✅ 객체 감지 실행
detect_objects("red.jpg")


위처럼 객체인식도 진행 될 것이다!